3.4 Location considerations
Your filming location is something that should be considered in conjunction with your script. Reflecting on the content of your project and any connections it has to particular locations is a good place to start. However, the aesthetic certainly isn’t the only thing to consider. You also need to think about the potential advantages or challenges that it presents for sound and lighting, and any processes you might need to go through to gain permission to record there.
3.4.1 Permissions
If the place you have chosen is not on the University of Melbourne campus’ or in your own home, you may need specific permission to film there. For example, filming on private property requires permission from the owners, and crews of three or more people in public locations require a filming permit from the local Council to issue you a filming permit. The level of insurance cover you will need may also increase if you want to film in some public places.
Given that applying for and receiving these permissions can be time-consuming, it is important to look into what is needed as early as possible to avoid any unplanned delays or interruptions to your filming.
3.4.2 Sound
We think the most important thing to consider when choosing your filming location is not how it looks, but how it sounds. People are generally quite good at ignoring background noise in real life, but hearing it in recordings is a different matter. Poor audio quality or background noise will inhibit your audience’s ability to tune into your message properly.
We recommend checking before you settle on your location. To do this, stand in the room you wish to film in– switch on your recording device and capture one minute of atmospheric room noise. Listen back to this recording using headphones or a good quality speaker. The types of sounds that typically turn up include fridges that buzz, heating or cooling systems, a television in another room, construction workers on building sites, and trams or busy roads nearby.
Consider which of these sounds you can control. Turning off the fridge, heating and television for 30 minutes whilst you record will help. Additionally, some parts of the day might be quieter than others—very early morning or evening perhaps.
If the location you’ve chosen is too noisy, you will need to find a new place to record.
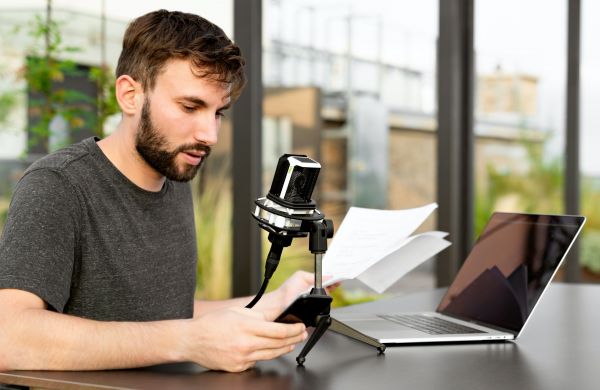
In terms of audio recording gear, to level up your sound quality there are external microphones commonly available that can plug straight into your device.
Once you’ve found a quiet space, it’s time to think about lighting. The goal is to have soft and even light on your face. In an ideal scenario, beautiful natural light will spill across your filming location for your entire shoot. However, we understand this is often not what reality will present to us! Here are some tips to help you consider the light available in the space you have chosen and how you can position the camera to your advantage.
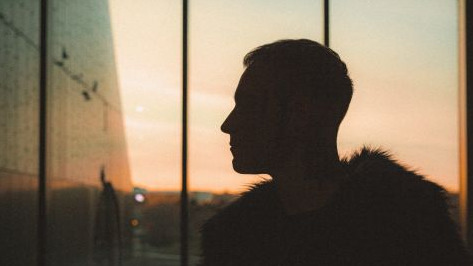
If there is a window in the space and you are recording during daylight, it is generally best to position yourself facing the window. This will ensure your face is well lit rather than in shadow.
Here is an example of a backlit presenter (left) as opposed to someone facing the window (right).

If there are no windows, it is likely you are using artificial light sources. Ceiling lights can cast unflattering shadows on your face, so you will likely need to add some additional sources of light to counteract this.
Here are some examples of situations where natural light is not forthcoming or consistent, and how you might create good lighting:
- Don’t rely on downlights alone, as they can create strange shadows on your face.
- Desk, bedside or living room lamps can all be good options for lighting your face and presentation area adequately. Try setting up two lamps on either side of your body, out of the recording frame providing an even lighting effect across your face and body. Ensure all the bulbs used are the same colour.
- Pointing a bright lamp at a wall that it can reflect off rather than directly onto your face can create a softer wash which is often helpful for video.
- If needed, you can mix light from a window with internal light. Changing your bulbs to new "Daylight" or "Cool Daylight" balanced ones will ensure you look great.
If you are lucky to be using natural light, remember to think about the time that your shoot is happening and test out your lighting at that time on another day. You might also consider what effect different weather would have and ensure there are some back up lighting options at hand just in case.