Managing marking online for the end of semester
After a semester of online learning, we now look at marking student assessments and exams online. Using Canvas Gradebook features, you can create a workflow for marking that suits your needs.
The following tips are general, and we encourage you to contact us if you would like to speak to someone about the particulars of your marking scenarios.
Before you begin any marking, ensure that marks are hidden from students
Before beginning marking, hide the marks from students to ensure that some students don't receive their marks before others, and that you are able to finalise and moderate marking as needed before they are released.
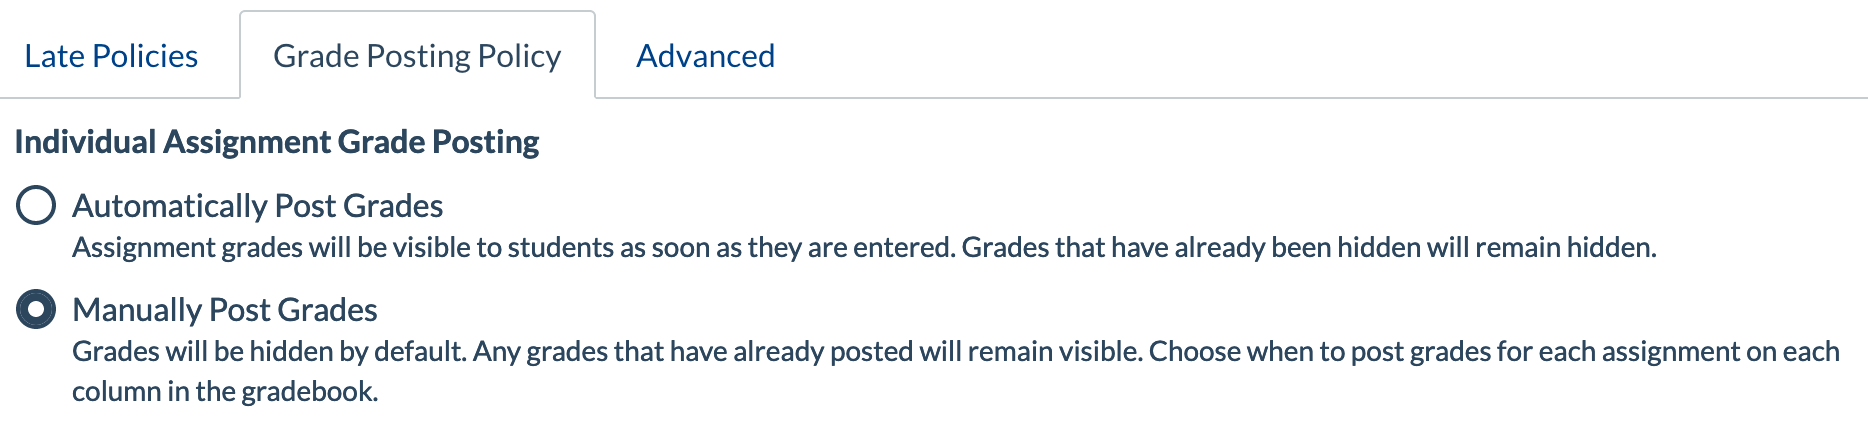
To ensure that your marking is hidden from students, check that the 'grade posting policy' is set to manual before you begin marking. You can do this globally for the whole Gradebook by clicking on the settings icon on the top right of the Gradebook.
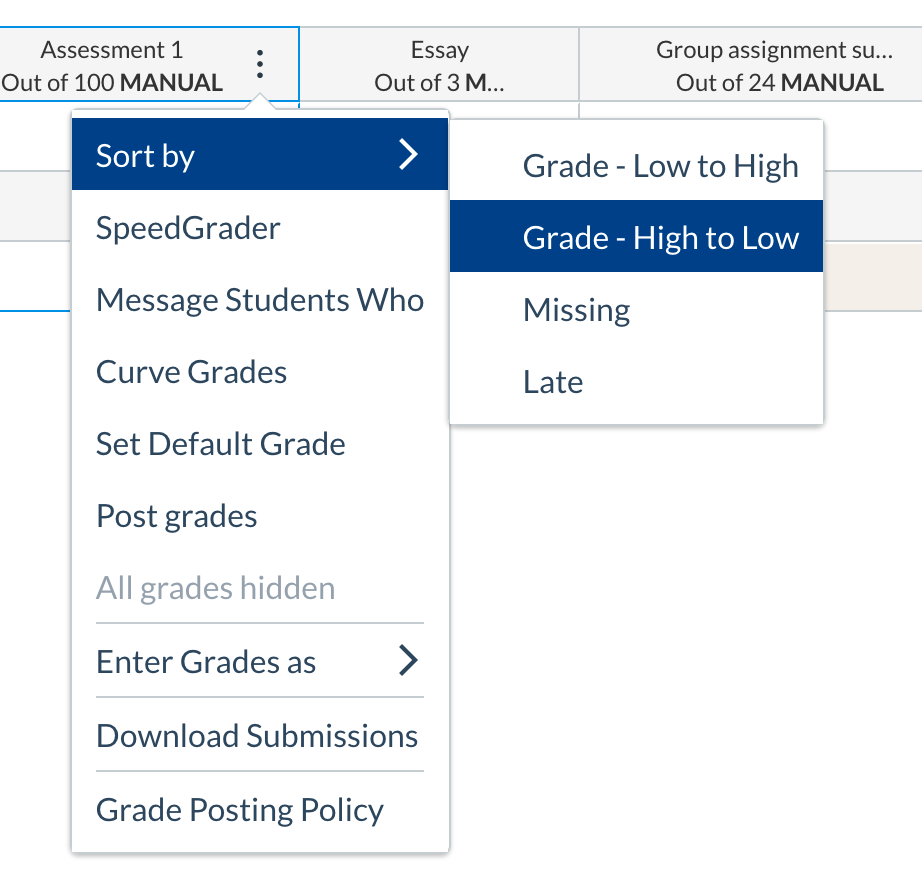
Alternately, you can set the 'grade posting policy' for an individual assessment column by clicking on the 3 dots at the top of that column.
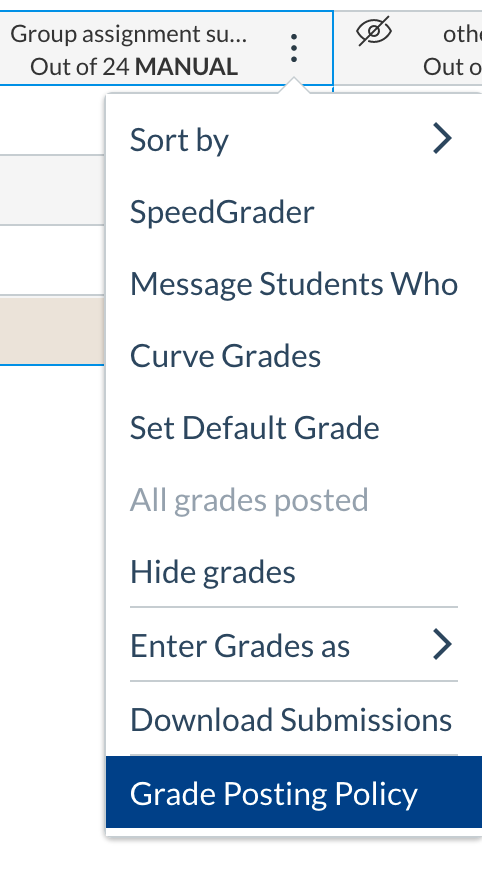
Setting the 'grade posting policy' to manual ensures that grades are not automatically posted to students as you input them.
Further information on the grade posting policy setting in Canvas.
Ensure that only one person is marking an individual student's assignment at a time
When marking in teams, it is necessary to make sure that only one marker is accessing an individual student's submission at a time. If more than one marker is accessing one student's submission at the same time, your marks and annotations can be lost.
To mark in teams, first decide who will mark which students. This could mean that one marker is allocated a particular tutorial group, or specific students within the cohort. Once each marker has been allocated their students, they can use the Canvas Gradebook filter settings to view only the students they need to mark. In the case of a tutorial group, the marker can use the Filter option to select the particular tutorial.
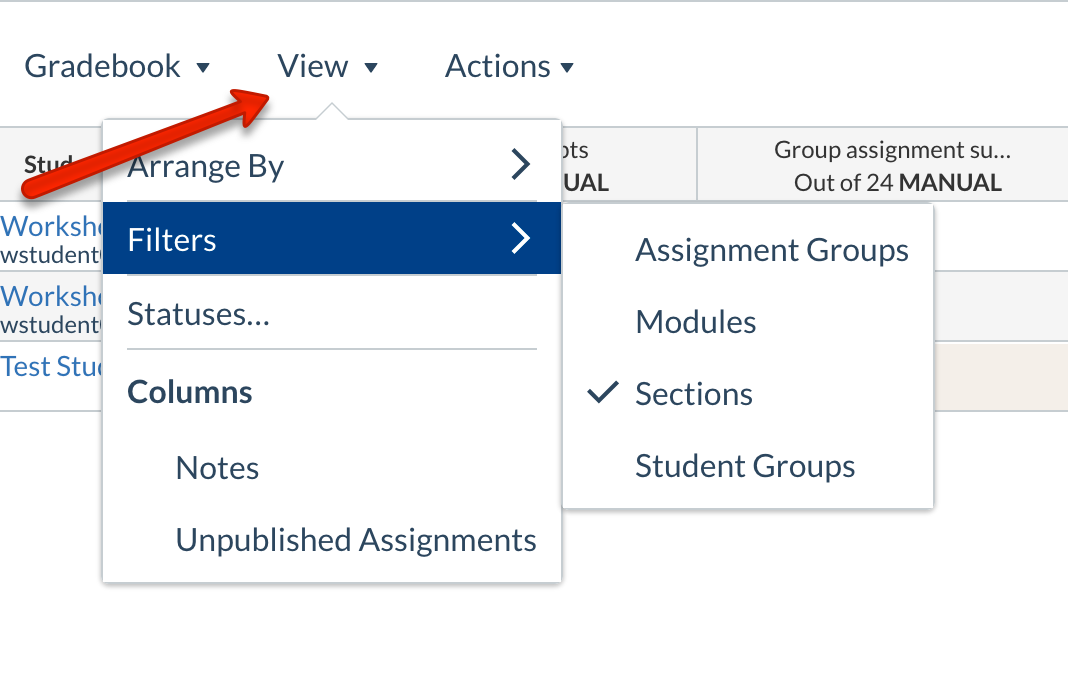
To create sections of students that you can then use to filter the Gradebook with, see this guide.
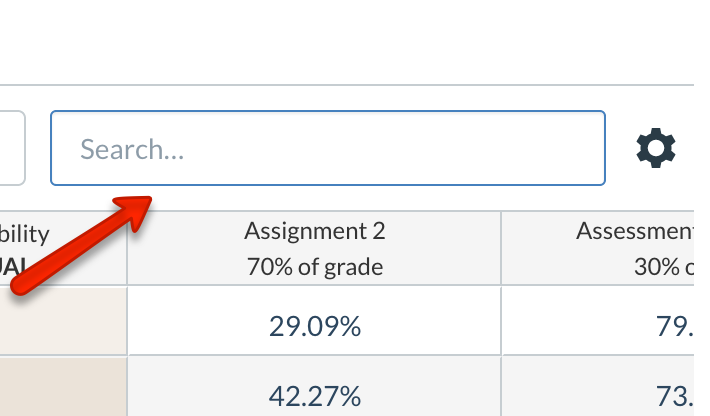
In the case of marking particular students, markers can use the Search box in the Gradebook to search for the relevant student name.
If you have a marking plan where multiple markers are each assigned specific questions within the same assessment to mark, the best way to manage this is to determine time periods that each marker will be accessing papers. This will avoid two or more markers accessing the same submission at the same time.
Sorting columns in Gradebook
During the marking process, it may be necessary to check the spread of grades, or which students have or have not submitted. To make this easier, you can use the 'sort' functionality on each column. You can sort the column so that it shows grades high to low and vice versa, or you can sort the column so that it shows students with no mark/submission.
Preparing final marks
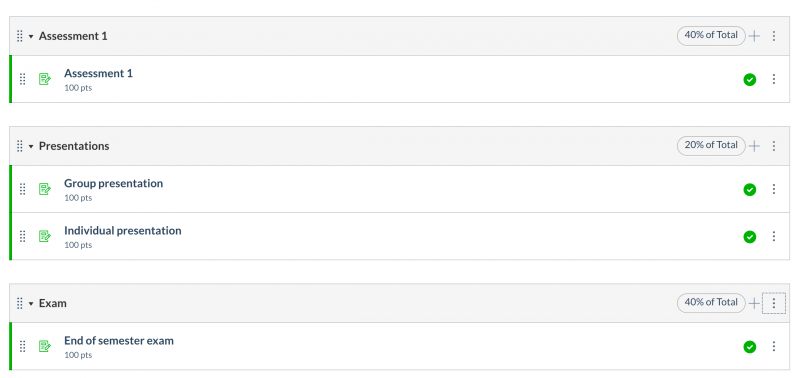
Remember that not all marks that you see in Gradebook contribute to the final grade for a student. Go to the 'Assignments' area of your Canvas subject and check the Assignment groups to review which assessments contribute what percentage to students' final mark.
You can work offline if required
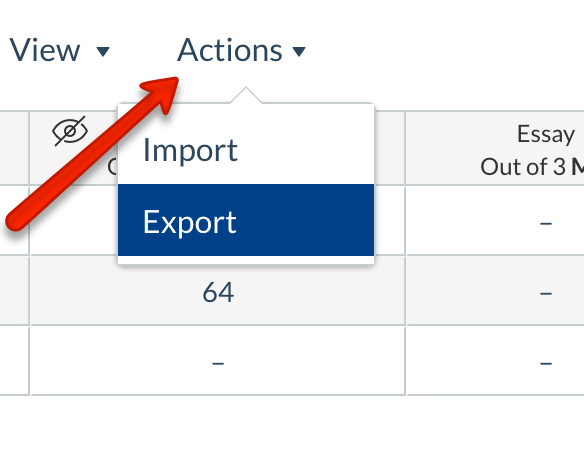
If you need to, you can download the Canvas Grade book to Excel, allowing you to work with your grades offline. Simply click the 'Actions' menu and select Export.
You can also import marks to Gradebook for assessments that occurred offline and did not require a student submission. Simply set up an assignment with the setting 'no submission' so that a column is created in Gradebook, then import the marks from Excel to that column. To import, click the 'Actions' menu then select 'Import'.
Use the Gradebook history overview
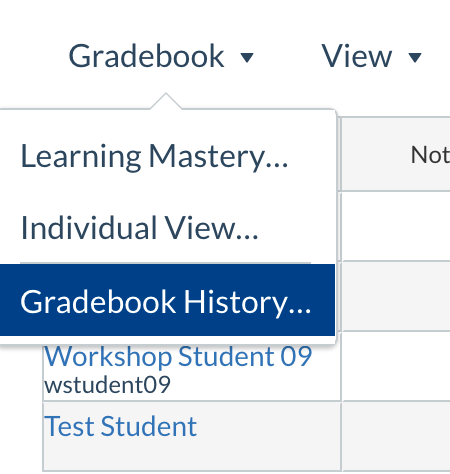
The Grade history overview in Gradebook can be useful if you ever need to see who has marked a particular student, or how marks have changed for a student over time. The Grade history overview shows all actions by all staff members in the Gradebook, allowing you to backtrack and revert to earlier grades if discrepancies arise.
To access the Gradebook history, click the 'Gradebook' menu on the top left, then select 'Gradebook History'.
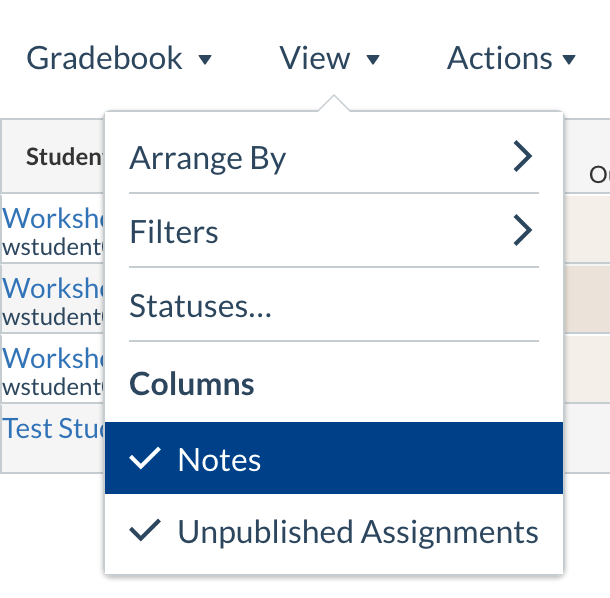
Use the notes column
The notes column in Gradebook allows you to add free form text against each student. This may be useful if you need to flag students with special circumstances for their assessments, such as a student who is exempt from a particular assessment or has an extension. To use the notes field, click 'View' on the top left of the Gradebook, then 'Notes'.
For more detailed information on any of the concepts above, you can access step-by-step guides here. If you would like to discuss assessment and marking with someone from our team, please contact Learning Environments.