Recording my Zoom session to the Cloud and giving students access
You can either set up your session to record automatically, or you can press record when you are in session. Both methods are explained below.
You can also set up your session to record to the device on which you are hosting the session, and/or to record to the Cloud. We recommend you record to the Cloud, due to large file sizes generated by Zoom recordings.
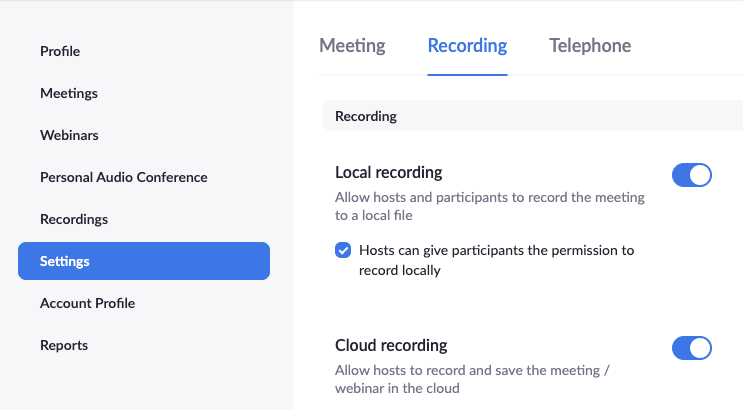
To enable Cloud recording, log in to your Zoom account and navigate to your Settings. Go to the Recording tab and ensure that the Cloud recording option is enabled. This is a global setting that you only need to enable once; you do not need to do this every time you run a Zoom session.
Option one: recording automatically
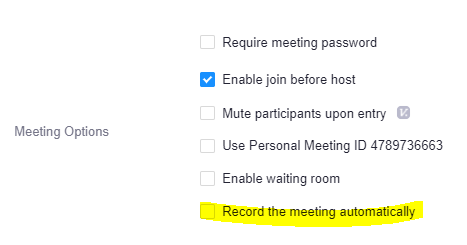
When you are scheduling your meeting, tick the option Record the meeting automatically.
Option two: recording during session
Once you open your Zoom session, press Record. We recommend recording to the Cloud.

You can also pause and stop recording during the session.
Accessing your recording
If you have chosen to record to the Cloud, you will be emailed a link to your recording. The recording will include a video file, an audio-only file, and Chat stream text file.
Once you have downloaded the file you can give students access in multiple ways:
- Provide students the download link by publishing it to an appropriate place in your LMS subject - we recommend against this method due to the recordings eventually expiring in Zoom
- Upload to My Media (Kaltura) in the LMS. Once your video is in My Media, you can embed it in a page.
- Upload to Lecture Capture (Echo360).